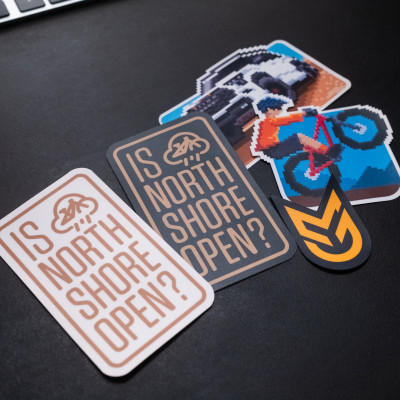
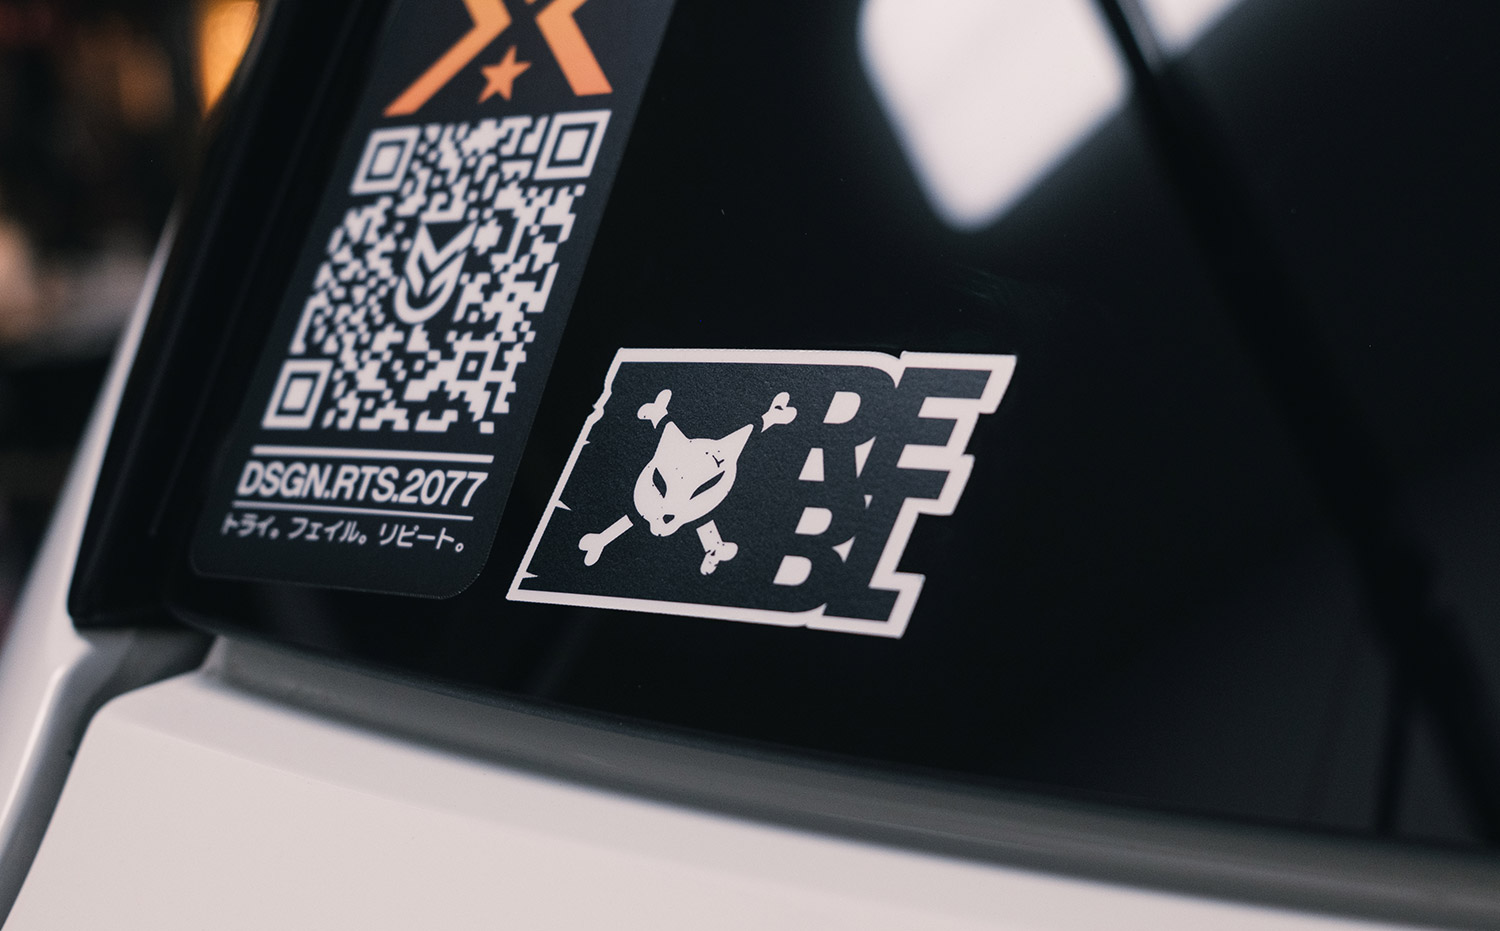
When I say 90% as good, what do I mean? The main difference between the stickers I make and the ones I’ve had made professionally is UV resistance. Most professionally printed stickers can handle being in direct sunlight for years without fading or breaking apart. At least that has been my experience. With my home-made stickers, colors will fade over time and will slowly dry up, peel/crack with constant sun exposure. The professionally printed stickers also tend to be slightly thicker and feel a bit more “stretchy”? They are definitely nicer, but the machines that make them cost more than an entry level luxury car. It is worth noting that I have had one of my stickers on the back of my car for over 6 months now and there’s currently no signs of fading or peeling. My car is parked in a garage when not driven so it is not in constant sun exposure. I have also had a sticker on a water bottle for a year now with hundreds of hand washes and it’s still on there. I think the trade-offs are pretty fair considering you can print stickers at home any time, in any quantity, and you get a final product instantly. When a sticker does wear over time, just make a new one!
If you want to print hundreds of stickers, it’s probably best to use a professional print service. If you want to print super high quality stickers to sell or need great UV resistance, use a professional print service. If you want to print a dozen or so stickers for yourself, friends & family, or give out for free in reasonable quantities, printing from home is the way to go. It’s also a great way to quickly test out new designs and make iterations before you get it mass produced professionally. If you are sold on making your own, lets get started!
What you need:
The following items listed are exactly what I use personally to create stickers. There are many alternative products out there that can do the same thing and the results could be better or worse. But these are what works for me. These are also Amazon affiliate links which don’t cost you any money, but provide a small kickback to me to buy more materials in the future.
-
Color Printer
Epson EcoTank Photo ET-8550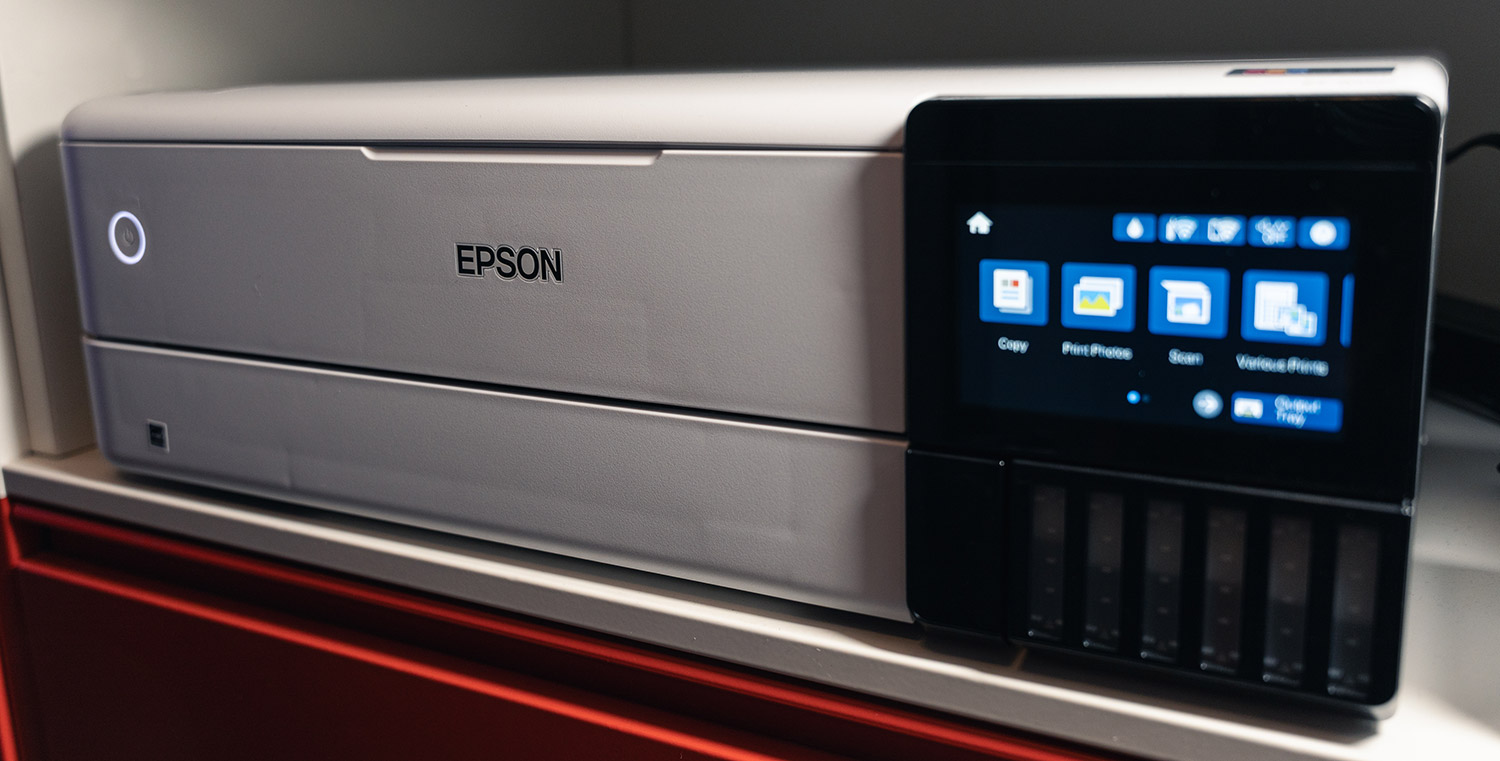
Epson EcoTank printers are amazing! Instead of a cartridge ink system which is really expensive and need to be replaced often, these have refillable ink tanks which last forever! I’ve owned my EcoTank printer for almost 2 years now, have printed hundreds and hundreds of things and my ink tanks are still over 1/4 full. I can’t recommend them enough for any sort of quality color prints. There are cheaper and more expensive EcoTank printers, so do your research on what fits your budget best. There is also a line of EcoTank printers that use archival inks which should provide better UV protection, but I don’t have experience with them. They tend to cost more than the consumer versions.
-
Cutter/Plotter
Brother ScanNCut SDX125EGY
I used a Cricut for years, and while it gets the job done, I absolutely hate their software, limitations, and how buggy they are. After a bunch of research, I ended up switching to the Brother ScanNCut and it’s been a much better experience. These machines can cut all kinds of things, but I use it specifically for cutting vinyl stickers. I love that I can prep my artwork in my own design software and not have to deal with dumbed down software for craft moms (nothing against craft moms!).
-
Sticker Paper
Colemoly Sticker Paper Printable Vinyl
I’ve tried at least a half a dozen different vinyl sticker papers, and this the best one I’ve used so far (as long as you can endure the blatant typo in the packaging). I’m sure there’s something better out there, but I’ve been really happy with these so I’ve ended my quest to find a better paper. What makes it better than the others? It’s thicker and sticks better than the others. I recommend the glossy version so the colors really pop. You’ll still get that nice satin look once you put a matte laminate over it.
-
Matte Laminate Cover
Kosiz 100 Pack Matte Self Adhesive Laminating Sheets
These matte laminate stickers go over the vinyl sticker to provide waterproof protection and give that nice satin look. You can use a glossy sheet if you prefer a really glossy sticker, but I haven’t bothered to make any.
-
Squeegee/Scraper
FOSHIO 8 Inch Felt Squeegee for Vinyl
Finally, you’ll need a squeegee or scraper that’s long enough go across most of an 8.5x11” (standard letter) sheet of paper. This is what you use to press the laminate over the sticker. I’ve tried other things like rollers, but nothing works as well as a simple scraper. The hard plastic edge works much better than the felt edge too so you don’t need one with felt.
Lets Make Stickers!
Prep Artwork.
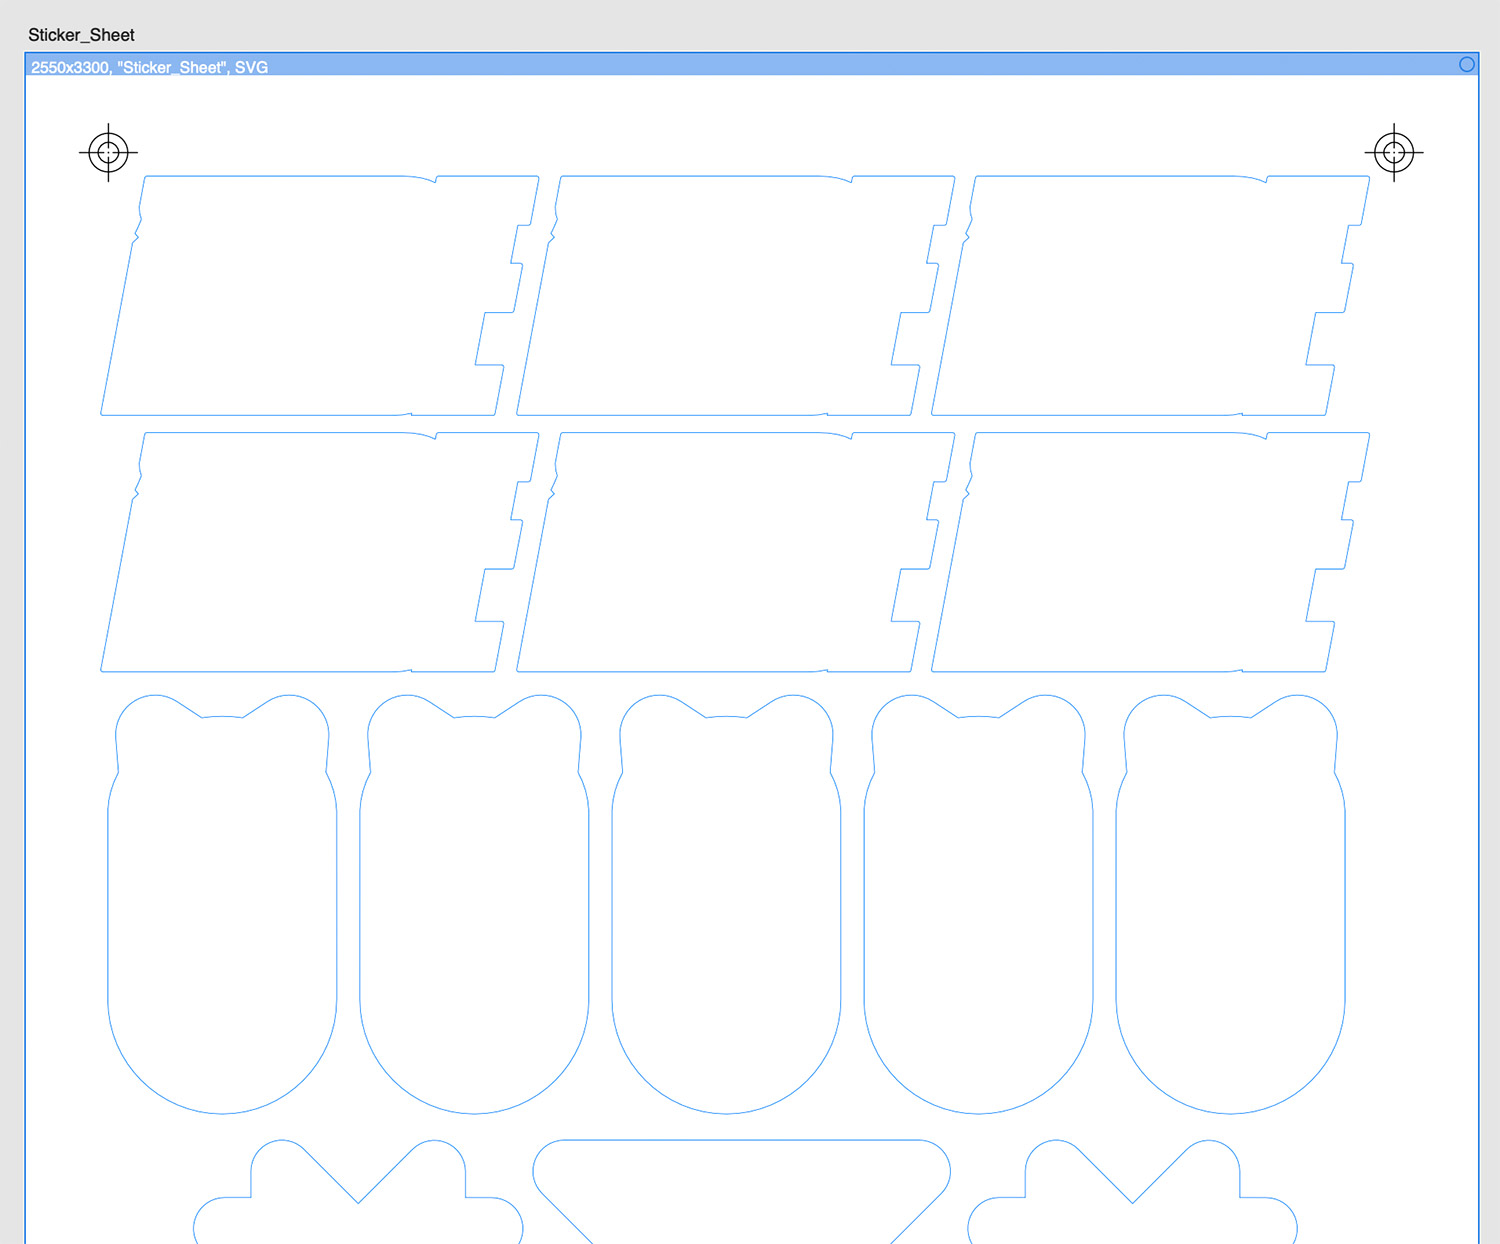
The first step is to prep your artwork for print. I use Affinity Designer, but you can use any vector-based application. A raster application works fine too in most cases, but you’ll need to export a vector file for the cut lines. Place all of your artwork on an 8.5x11” (letter) artboard. Make sure to keep stickers away from the edges where the printer won’t print. You could potentially set the printer to print full bleed to make use of more of the paper, but I don’t do that.

Create Registration Marks.
Registration marks will be a huge help in lining up your cut line to the artwork later in Brother Canvas Workspace. Create and add registration marks to each corner of your document (can be whatever design you want as long as it helps you line things up as perfect as possible). You’ll want to print these marks with the artwork as well as export them with the cut lines to be imported into Brother Canvas Workspace.
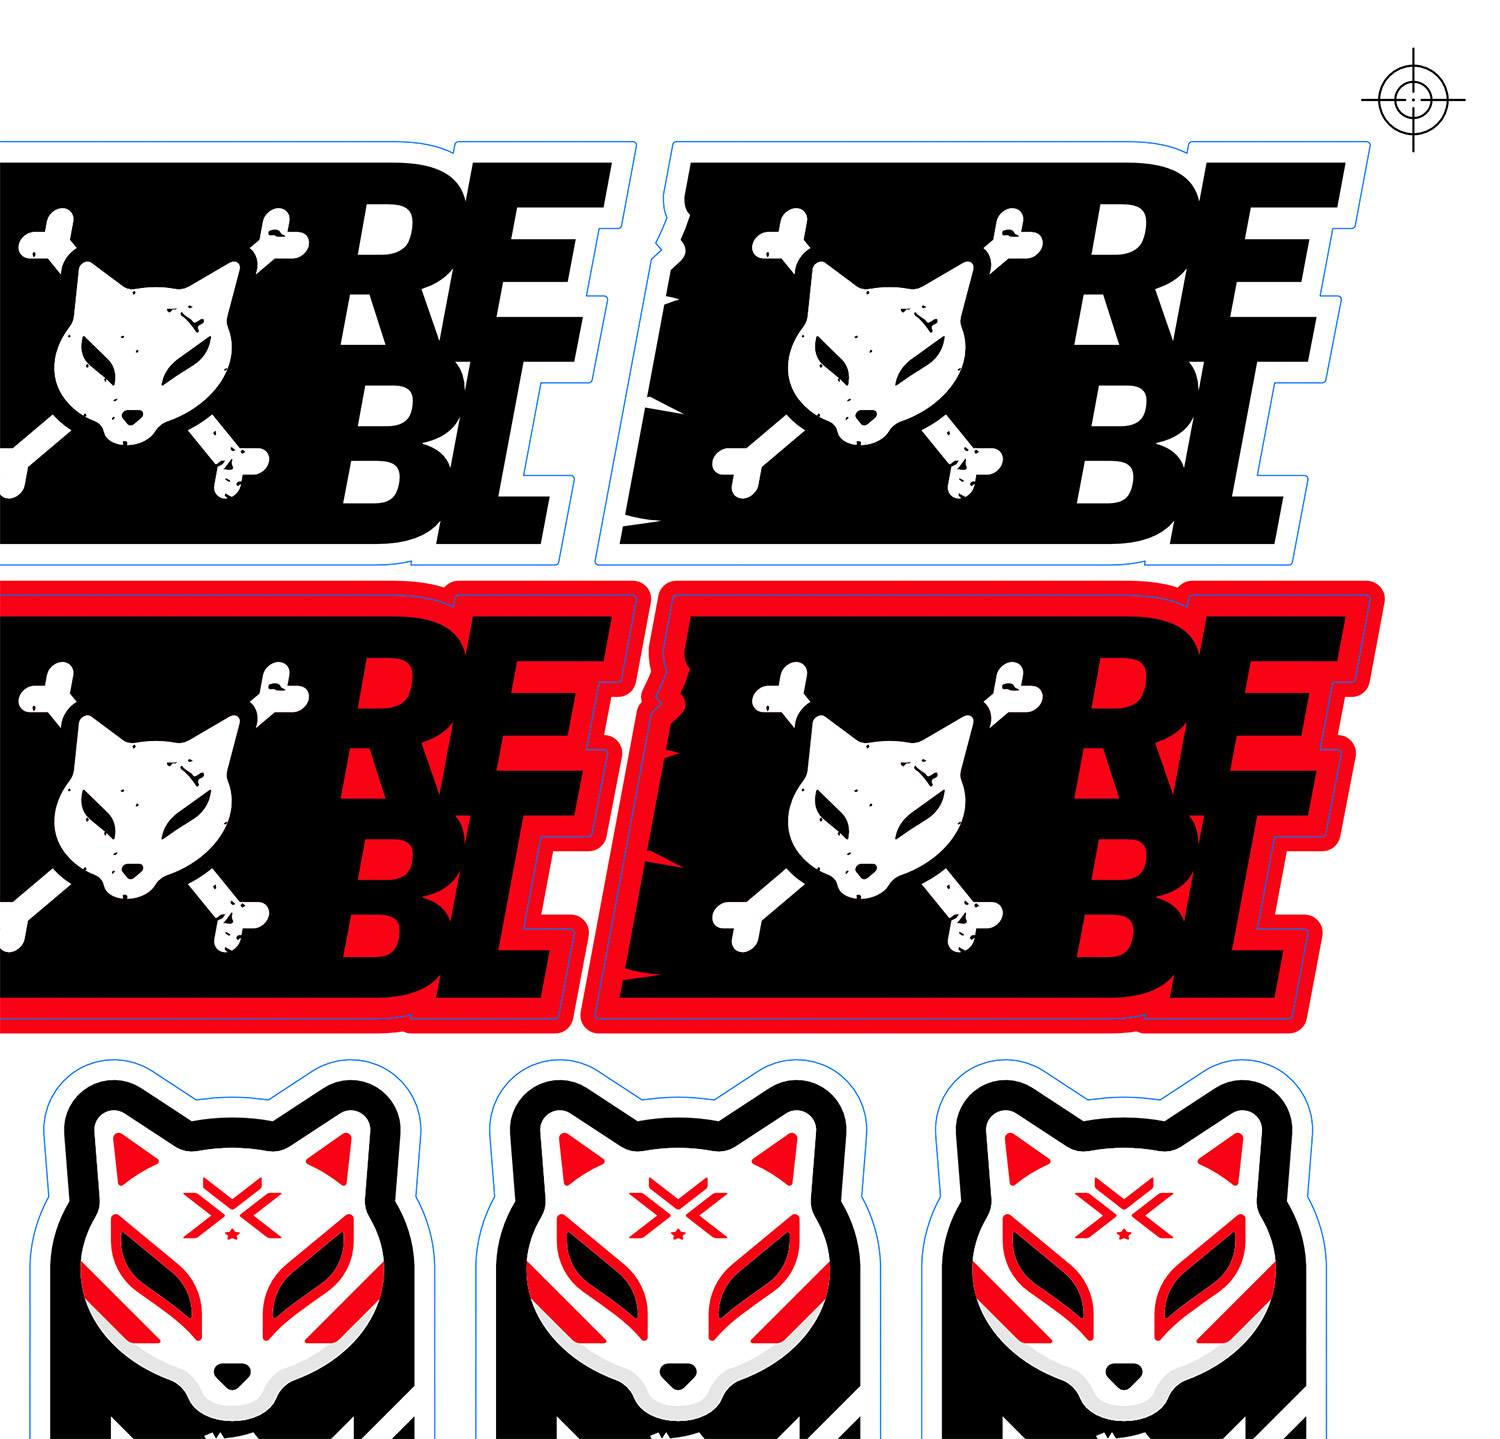
Create a Cut Line and Bleed.
If your artwork has a white border or background, you don’t need to create a bleed. If your artwork goes right to the edge of the sticker, you’ll need to create a bleed in your artwork because you will almost never get a perfectly aligned cut on your sticker. Creating a bleed can be tricky depending on the detail of your design, but this article is for designers and so I’m assuming you know your way around your design tools enough to add a bleed. The bleed just needs to go out 5-10 millimeters.
The cut line should match the actual border of your sticker. Put them all in a separate layer as a stroke. You don’t want to print these lines. You need to save these cut lines and registration marks as an 8.5x11 (letter aspect ratio) svg file to be imported later into the Brother Canvas Workspace app.
Print Your Artwork.
I generally save my artwork as a PDF and then print with Apple’s Preview app. Place your vinyl sticker paper into your printer, select “Best Quality” for the print, and make sure you print 8.5x11” (letter) size and at 100% scale. You want to make sure your artwork is printed at the exact size you had on the artboard.

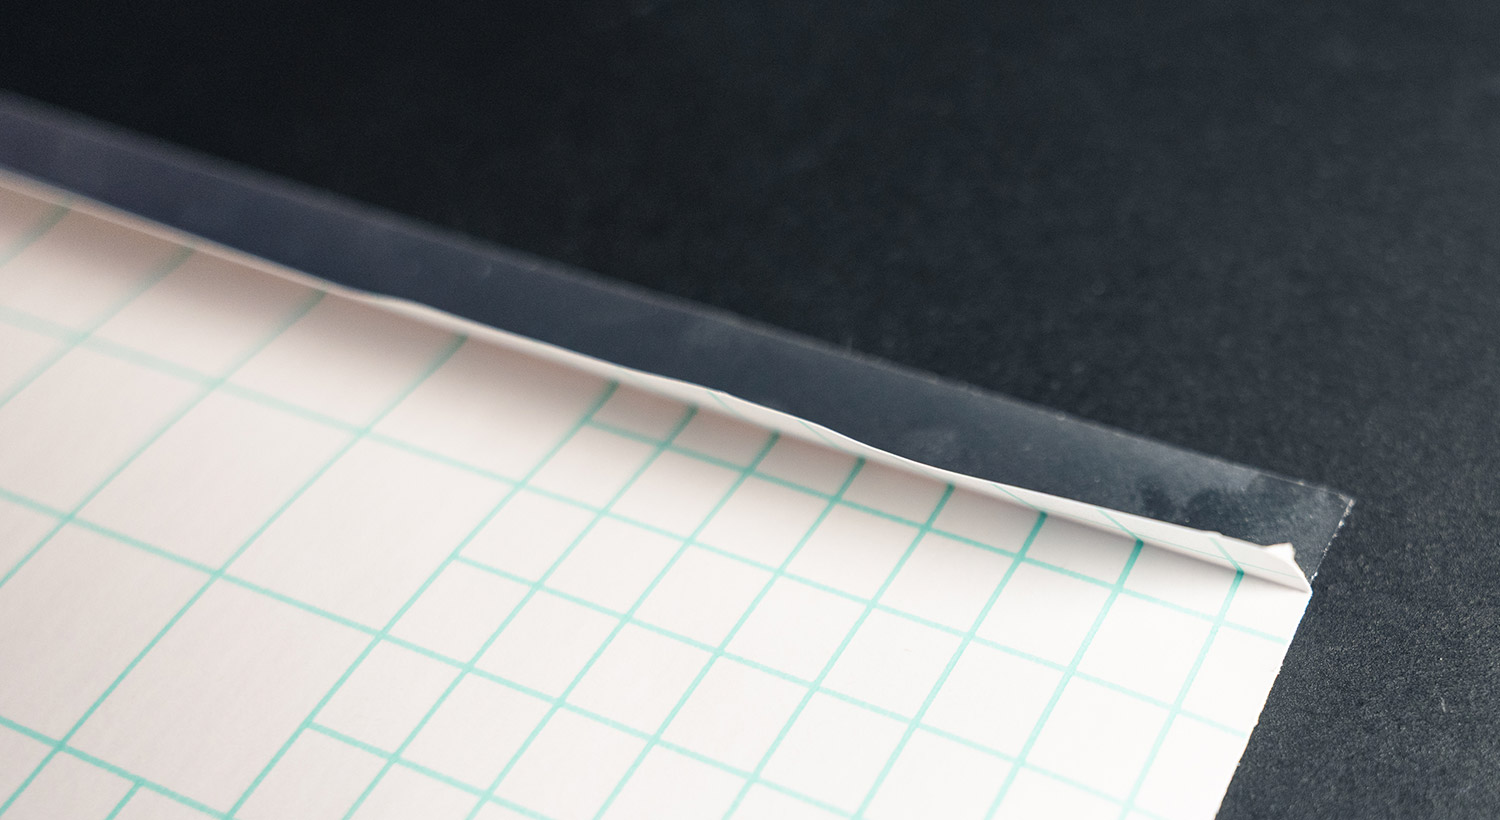
Add the Laminate Cover.
Now that you have your artwork all printed out, it’s time to add the laminate sheets on top of them. This is probably the hardest part of the process, but once you do it a few times, you’ll get the feel for it and it becomes very straight forward. I’ll do my best to explain the process, but in the end you’ll have to go through some trial and error and figure out what works best for you. It can be frustrating the first few times when you don’t get it right, but I promise you’ll figure out a process and be able to get it on without any bubbles every time.
First step is to separate the paper backing on one end and fold the paper so you have an easy edge to grab. You’ll also be able to stick the exposed part of the laminate on the the surface you are working on so it doesn’t shift while you squeegee it onto your artwork.
Stick the exposed piece of laminate on a clean, smooth surface in front of you and place your artwork paper behind it. You are going to press the laminate from front to back using the squeegee. Use the hard plastic edge of the squeegee and put light pressure across the whole width of the laminate and slowly push (away from you) the laminate onto your artwork with one hand while your other hand slowly guides and peels the paper backing off the laminate. To prevent air bubbles, you don’t want the laminate touching your artwork until the squeegee is putting pressure on them. It might take a few tries to get this right so maybe print a few sheets of your design in case you mess up (never hurts to have extra stickers anyways). Once you get the hang of it, it’s hard to mess things up.
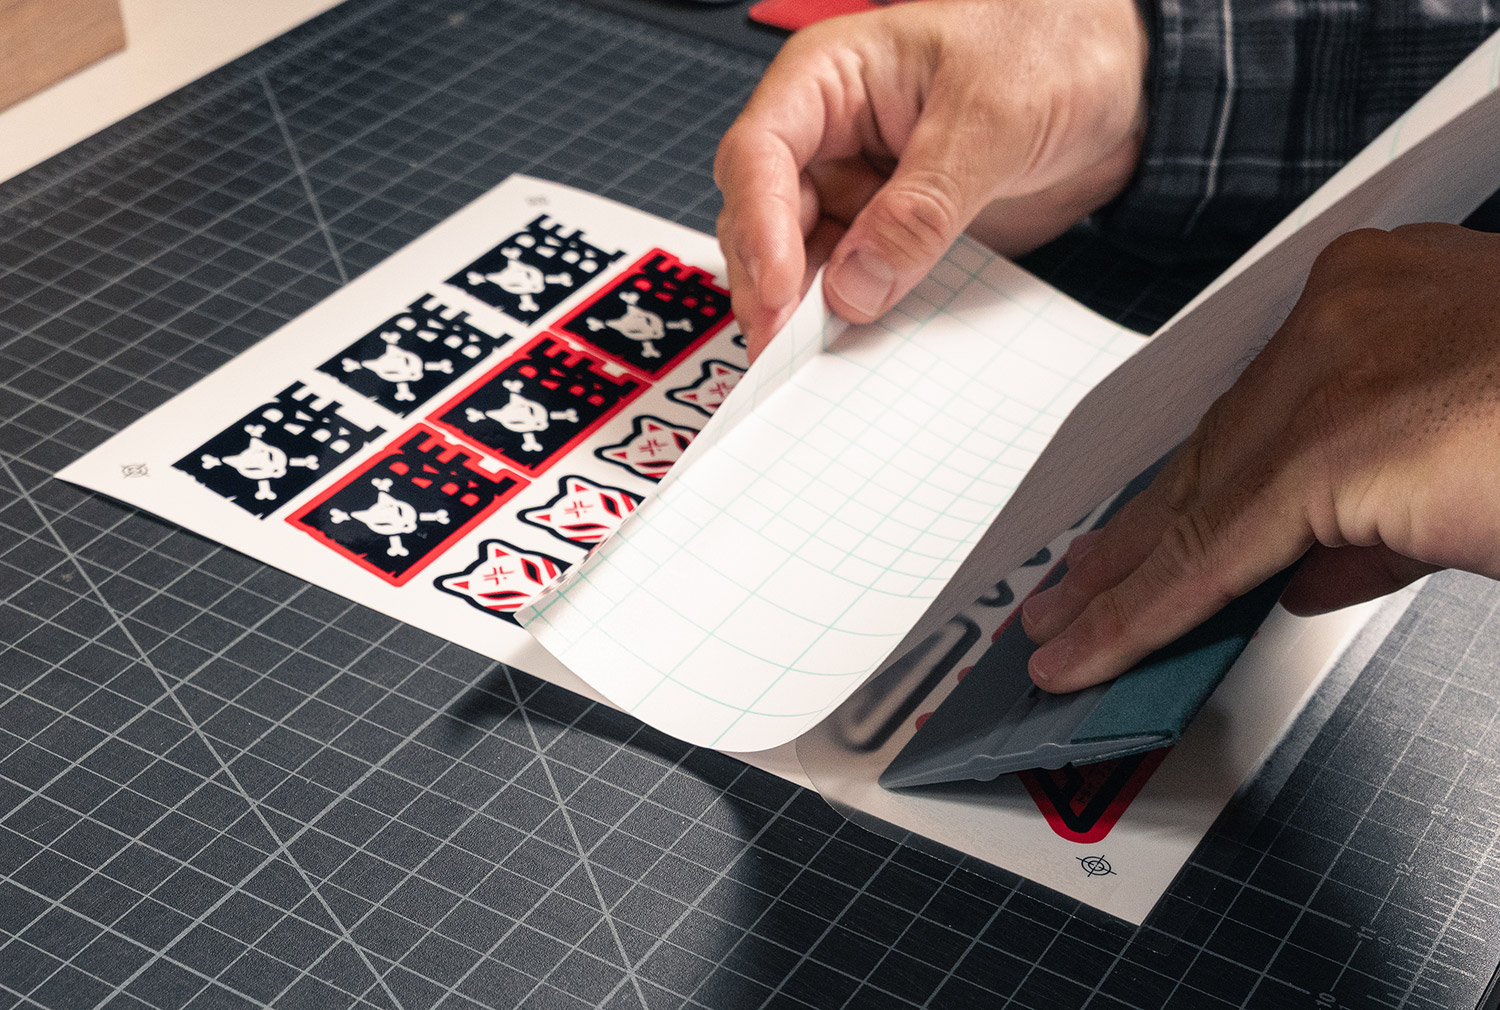
Once the laminate is over your entire artwork, use the squeegee to apply pressure over your whole artwork to make sure everything is stuck together well. You might still see a few air bubbles but should be able to push them off of your artwork with the squeegee. If there’s still a tiny bit of air, I wouldn’t worry too much. I’ve noticed they tend to go away by the time I cut the stickers out and do a final press with the squeegee.
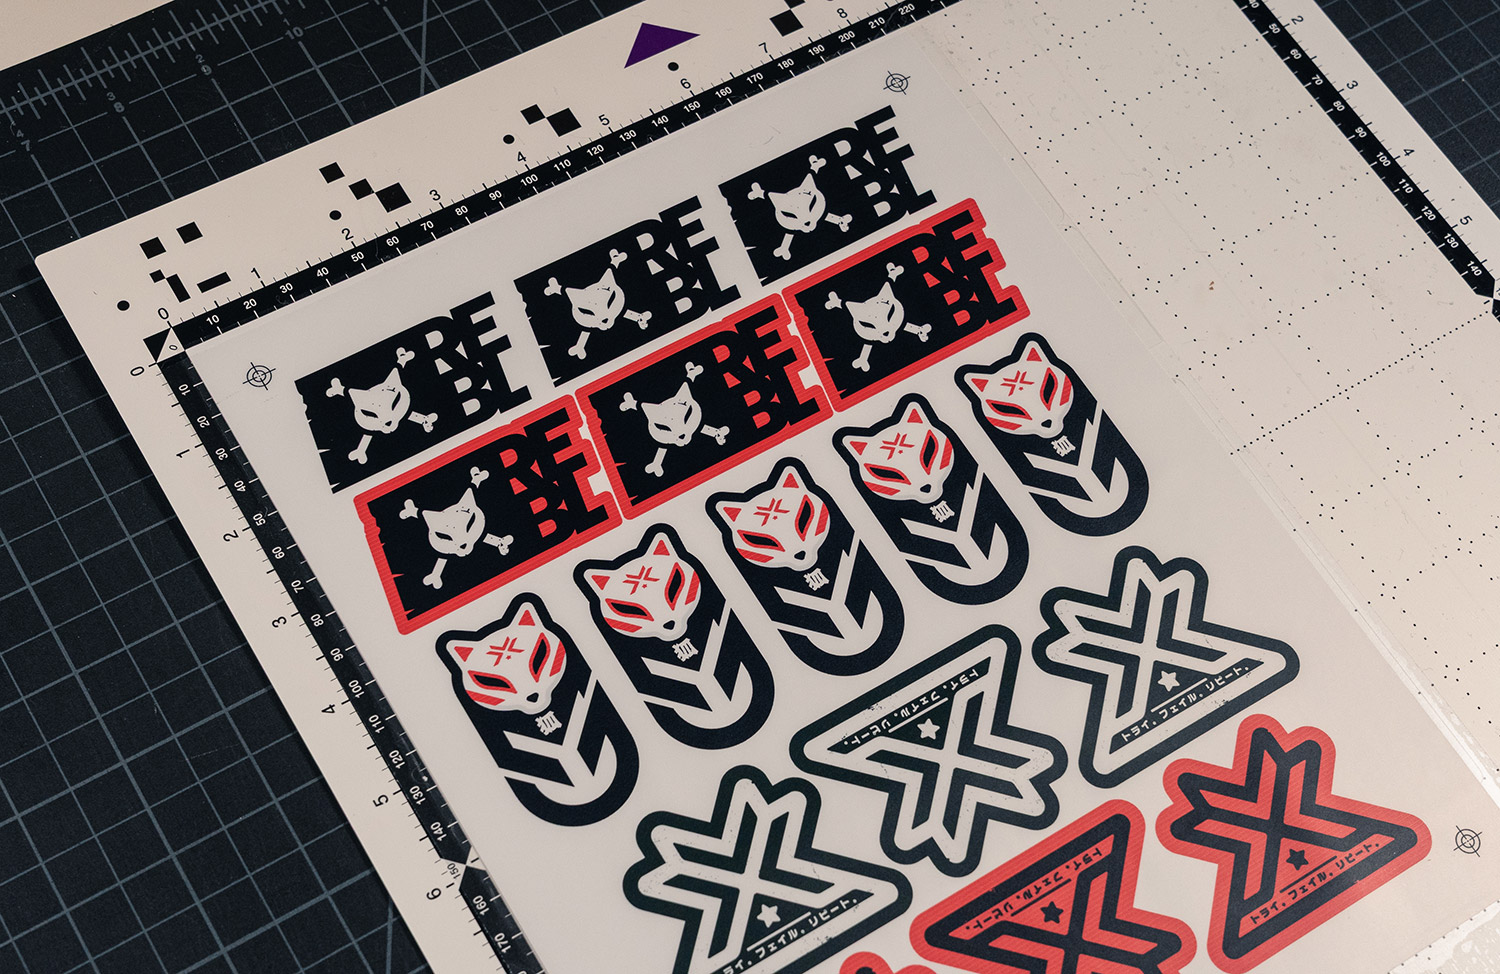
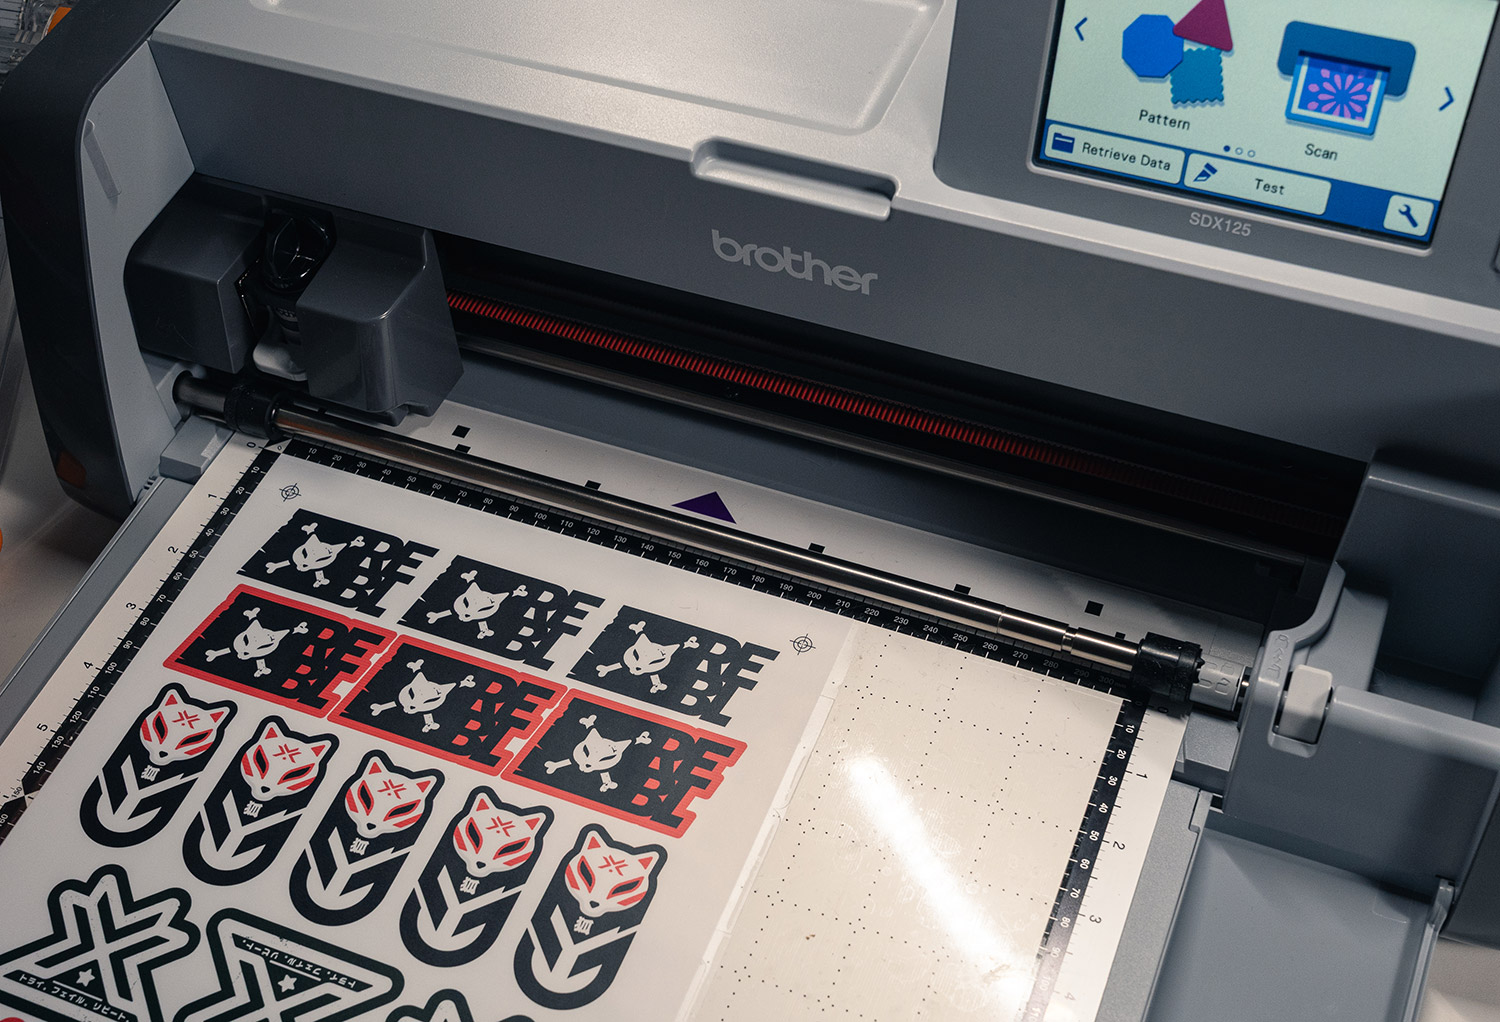
Place your Sticker Sheet onto the ScanNCut Cutting Mat.
Similar to Cricut, the Brother ScanNCut has a tacky cutting mat for you to place your sticker sheet onto. Do your best to line up the top and left edge of your sticker paper with the black border of the cutting mat. The straighter you can place your paper, the less work you’ll need to do in the software to align your cut file to the artwork. Press your artwork down to make sure it’s properly stuck onto the mat.
Load and Scan Your Artwork.
Place your cutting mat with your artwork attached into the ScanNCut and load the mat. Once loaded, hit the Scan button on the touch screen and then Direct Cut. It’s going to ask you where you want the scanned image to go. Choose the computer icon. I should note that by this point you should have set up the machine to be on your network and have the Brother Canvas Workspace app installed and all set up on your computer. Data goes through Brother’s servers so you’ll need to have an account setup via the app as well.
Overlay Your Cut Marks.
The machine will then start scanning your artwork and will send the image to the cloud. Once the machine says it has done so, open the Canvas Workspace app on your computer, go to and select File > Import from Your Cutting Machine > Scanned Image. You should see your recently scanned image show up in Canvas Workspace. Now import that svg file you created for your cut lines. Since it’s just an svg, it won’t be sized correctly, but the aspect ratio should be correct so select the whole vector group in the layers panel and group them. Then go to the transform panel and set the group to 8.5x11 in size. With the vector group still selected, drag and rotate the group so that the registration marks from the vector file line up as perfect as possible with the registration marks that were printed and scanned in. You’ll see that it’s almost impossible to get all four to line up pixel perfect which is why creating the bleed in your artwork is important. One small tip that has worked for me is to make the whole group slightly smaller. Instead of setting the width to 8.5 I set it to 8.49. I don’t understand the logic, but through trial and error I’ve been able to get more centered cuts that way.


Once you have lined them up as best as possible, delete all of the extra vector data that you don’t want cut. This will be the registration marks, and the document frame. The only vector art left should be the actual cut marks for your stickers. The scanned image layer can stay as it doesn’t get sent back to the machine, but doesn’t hurt if you delete it at this time. Now go to File > Export/Transfer FCM File (or cmd-e) and choose Transfer FCM File via the Internet. You can now go back to your ScanNCut machine.
Time to Cut!

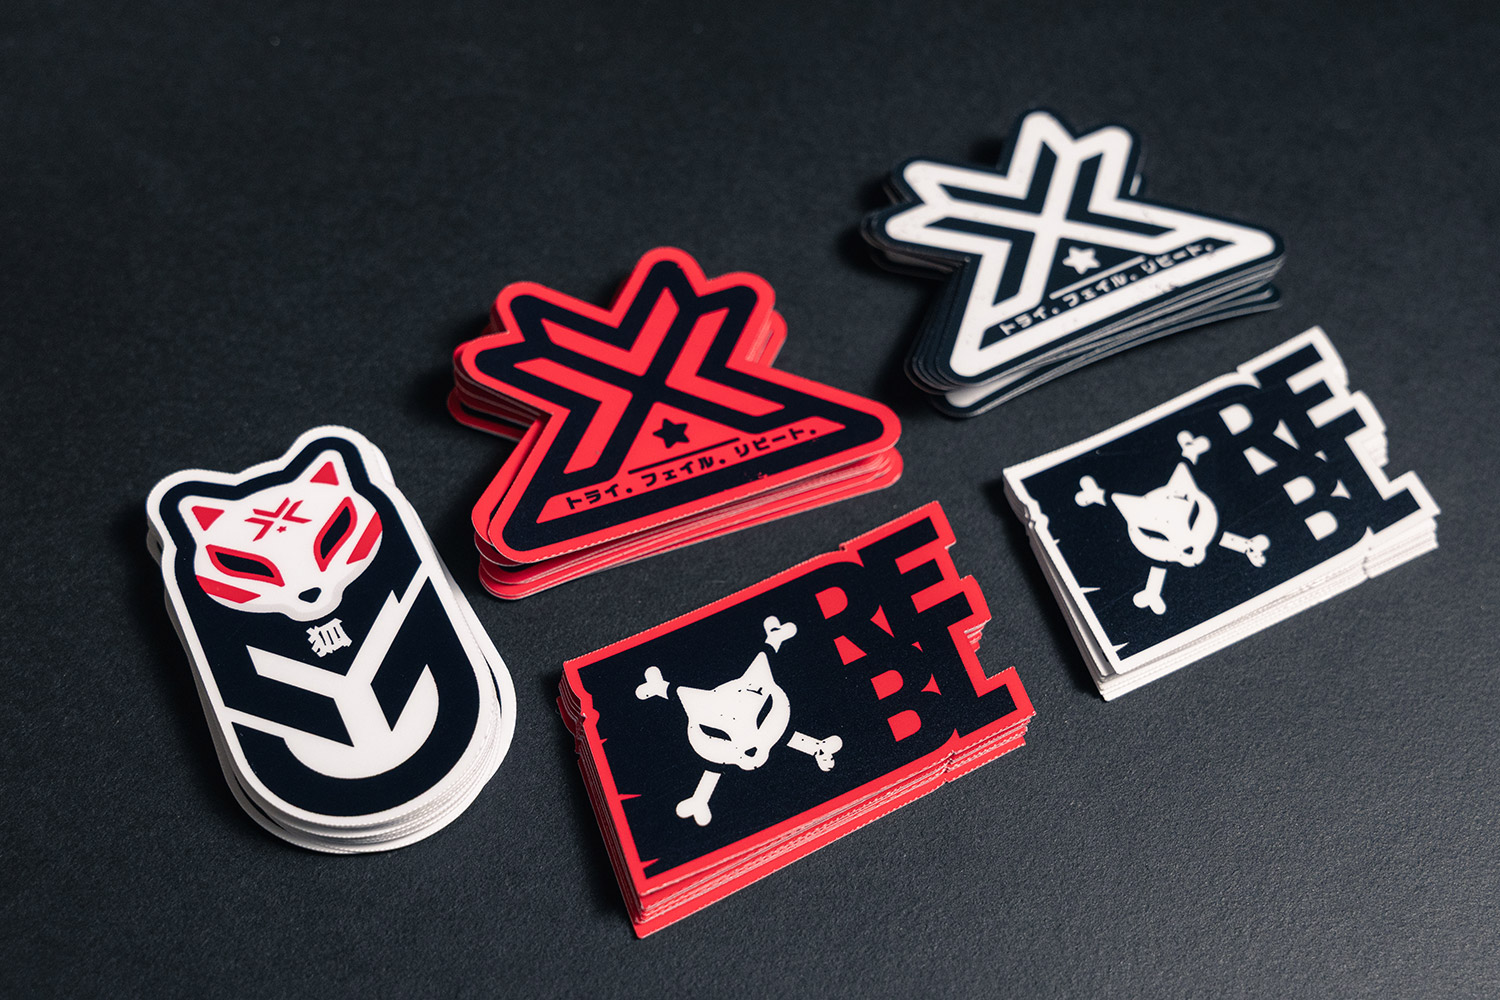
You should see a button to retrieve your cut data. Press it and you’ll see your vector cut marks overlaying the scanned image. Hit the OK button on this screen. On the next screen, choose Cut as the action and then Start. The machine will start cutting out your stickers! Once it’s done, unload the mat and take your stickers out. I run the squeegee over each sticker after (pressing from the inside outwards) to make sure the edges are nice and flat.
Final Notes.
Reading this article might make the process seem very daunting. I just wanted to be as thorough as possible. Once you’ve made a few, you’ll find that it’s not bad at all. You’ll be far more excited by the fact that you can turn a sticker design idea into reality in 15-30 minutes after you’ve finished a design. If this article does end up inspiring you to make your own stickers, I’d love to hear about your experience! Tag or mention me on Mastodon, Bluesky, Instagram or Facebook.
❤️ Enjoyed this post? Share it on your socials and don't forget to subscribe to the feed in your RSS reader!

